RSS

Category Archives: Sauce

The 20 Most Popular Recipes of 2014 – NYT Cooking

The 20 Most Popular Recipes of 2014 – NYT Cooking.

Here are the 20 most popular recipes for 2014 in the New York Times Cooking site. I have tried a bunch of recipes from NYT Cooking this year and they have all been fantastic, so you are likely to find some great ideas for something new or a way to change up a classic recipe you have been using for years. Check it out!


Tags: , , , ,

A Week of Hectic Action Finally Calms for Chicken Tenders with Honey Mustard Sauce

Hectic week seem to drive me crazy when they come along. This week it is seemed like it has been one thing after another every time I turn around. I finally got settled with my new computer and had a lot of work to catch up on. Throw on top of that that we had Sean’s birthday, my birthday, lots of work to do, Christmas cards, shopping for Christmas presents, and all of the other daily chores and assignments that come up around here and I just have not seem to have time to do much of anything lately. Add to that that Michelle will be traveling again shortly so I haven’t had a lot of opportunity to do much cooking lately either. One thing that I have been able to put together though, was an easy recipe for another one of Sean’s favorites, chicken tenders. Chicken tenders are always a great option for younger kids but they can be a crowd pleaser for just about anybody and make a great easy dinner when you need something to fall back on. This particular recipe that I am using today comes from Food Network and is from Patrick and Gina Neely. It’s a pretty simple recipe for chicken tenders with a simple honey mustard sauce to go along with it.


Chicken Tenders with Honey Mustard Sauce


Peanut oil or vegetable oil, for frying

2 pounds boneless, skinless chicken breasts

3 eggs

1 cup all-purpose flour

2 cups Panko breadcrumbs

1 teaspoon garlic powder

1/2 teaspoon cayenne pepper

1/2 teaspoon salt

1/2 teaspoon pepper

Honey Mustard Sauce, recipe follows

For the Honey Mustard Sauce:

1/2 cup Dijon mustard

1/2 cup honey

2 tablespoons mayonnaise

1 tablespoon lemon juice

Salt and pepper, to taste


Preheat the vegetable oil or peanut oil in a Dutch oven or large cast-iron skillet to 350°. Cut the chicken breasts into long strips and set them aside. Beat the 3 eggs in a separate bowl and measure the flour into another separate dish. Measure the breadcrumbs into a pie plate or shallow bowl and season them with the garlic powder, cayenne pepper, salt and pepper. Dip the chicken strips into the flour, then the beaten eggs and allow any excess to drip off. Then dredge the chicken strips in the seasoned breadcrumbs. Fry the chicken in the hot oil for 6 to 8 minutes, until the chicken is golden brown on all sides, and remove the pieces to a paper towel lined sheet tray. Fry the chicken in batches so as not to crowd the pan while cooking. Serve the chicken tenders with the honey mustard sauce.


For the honey mustard sauce, mix the Dijon mustard, honey, mayonnaise, lemon juice, salt and pepper together in a small bowl. This sauce can be made ahead of time and held in the refrigerator for up to one week.


These chicken tenders come out nice and moist on the inside with very crispy skin, which is perfect for what you want. These are great for all kinds of occasions beyond just weeknight dinner. You could use them to make a batch for a party or for when you’re watching the game or as an appetizer. The mustard sauce has good flavor to it and you could certainly use that for anything else besides the chicken if you have other appetizers that you like to dip in a honey mustard blend. This is certainly a better alternative than anything that you could buy frozen in a bag at the supermarket and these easy enough to make where you probably have all the ingredients on hand at home most of the time.


That’s all I have for today. Check back next time for another recipe. Until then, enjoy the rest of your day and enjoy your meal!


chicken fingers

 
Leave a comment

Posted by on December 12, 2014 in Appetizers, Cooking, Dinner, Poultry, Sauce


Tags: , , , ,

An All-Time Sean Favorite for His Party – Easy Cheese Fries

Sean’s birthday was last week and he had a little get together with some of his buddies this past weekend where they hung out, played video games, watched movies and ate a ton of food. Besides the pizza that we ordered from our local pizzeria, I also made a few things for the guys to eat while they were playing. It was a finger food kind of party so that everything could be eaten easily without interrupting the flow of their gaming. Of course no Sean party is ever complete without his all-time favorite – cheese fries. Sean has been loving cheese fries since he was a little kid and we pretty much have to order them out wherever and whenever we go someplace so it seemed only natural that I would make some for the party. Cheese fries don’t really need much of a recipe, but I did get this one from Rachel Ray because she makes use of a really great tasting cheese sauce to go over the fries to top them off.

Cheese Fries

1 bag frozen french fries, any brand or shape that you like (crinkle cut, thin cut, steak fries, waffle fries, etc.), prepared to package directions

2 tablespoons butter

2 tablespoons all-purpose flour

1 1/2 cups milk

2 1/2 cups shredded yellow cheddar cheese

Place the french fries on a baking sheet lined with aluminum foil and cook the fries according to the directions on the package. While the french fries are baking in the oven, prepare the cheese sauce. Place a large saucepan set over medium heat and add the butter. Melt the butter until it stops bubbling and then add the all-purpose flour. Stir the flour and butter together for about 1 to 2 minutes to create a roux. Use a whisk to stir as you pour the milk into the pot. Keep stirring continuously until the milk begins to thicken, about 2 to 3 minutes. Use a wooden spoon or heat-safe spatula to stir in the cheese to the milk mixture. When all of the cheese has melted take the sauce off the heat. Remove the french fries from the oven and place them in a bowl or on a serving platter. Cover the fries with the warm cheese sauce and serve, with extra sauce on the side.

This is a fast and easy recipe that kids of all ages seem to love and they can easily help you with this one in the kitchen as well. You can always add extra toppings to the fries if you want to shake things up. Try adding some sliced scallions, crumbled up pieces of bacon (a Sean personal favorite) or even some jalapeno peppers or other peppers if you want to make them a little spicier. You could also put some herbs or spices on the fries before you add the cheese sauce if you want some different flavors or try using different cheeses to get a bit of a different flavor to the dish. It’s a great party snack that you can put together pretty quickly with just a couple of ingredients and all of the kids really liked this one.

That’s all I have for today. Check back next time for another recipe. Until then, enjoy the rest of your day and enjoy your meal!

cheese fries

 
Leave a comment

Posted by on December 9, 2014 in Appetizers, Cooking, Potatoes, Sauce, Side Dishes, Snacks


Tags: , , , , ,

For Holidays or Any Time, Try Bobby Flay’s Roast Turkey with Mustard Maple Glaze

Just before Thanksgiving came around I had a turkey that I had purchased at the supermarket. Even though we weren’t going to be home for Thanksgiving, it’s hard to pass up a bargain when they’re selling fresh turkeys for $.79 a pound so I picked up one and decided I would make it after Thanksgiving and try a different approach with a new recipe. I had seen before Thanksgiving recipe from Food Network that was made by Bobby Flay for a roast turkey with mustard maple glaze that sounded delicious and looked relatively easy to make. It incorporated some different ingredients to make the glaze, such as maple syrup, horseradish, Dijon mustard, and chili powder. There was also a nice gravy that went along with it, so I decided this was going to be the one to give a try to, and I’m glad I did.


For the glaze:
1 1/2 cups pure maple syrup
2 heaping tablespoons Dijon mustard
2 heaping tablespoons prepared horseradish, drained
1 tablespoon ancho chile powder
Kosher salt and freshly ground pepper

For the turkey:
1 17 -pound fresh turkey, patted dry (neck and giblets removed)
Kosher salt and freshly ground pepper
10 tablespoons butter, slightly softened
12 cups homemade chicken stock
3 large carrots, cut into 2-inch pieces
3 large stalks celery, cut into 2-inch pieces
2 large onions, quartered

For the gravy:
1 stick unsalted butter
7 tablespoons all-purpose flour
Splash of dry white wine (optional)
1/4 cup chopped mixed fresh herbs (such as sage, parsley and tarragon)
Kosher salt and freshly ground pepper

To make the glaze: Whisk the maple syrup, mustard, horseradish and chile powder in a bowl and season the mix with salt and pepper. Cover the mixture and let it sit at room temperature at least 30 minutes to allow the flavors to meld. The glaze can be made up to 2 days in advance; store the glaze, covered, in the refrigerator. Bring it to room temperature before using.

Prepare the turkey: Remove the turkey from the refrigerator 1 hour before roasting. Preheat the oven to 450 degrees. Season the cavity of the turkey with salt and pepper. Rub the outside of the turkey with the butter and season it liberally with salt and pepper. Put 4 cups of chicken stock in a medium saucepan and keep it warm over low heat.

Place the carrots, celery and onions in a large roasting pan and place a roasting rack on top. Put the turkey on the rack, place the roasting pan in the oven and roast the turkey until it is a light golden brown, about 45 minutes.Tent the turkey loosely with foil if it is browning too quickly. Reduce the oven temperature to 350 degrees, baste the turkey with 2 cups of the warm stock and continue roasting, basting with 2 more cups of warm stock halfway through, until an instant-read thermometer inserted into the thigh registers 155 degrees, about 1 hour. After the turkey reaches 155 degrees, begin basting the turkey with the maple glaze; continue roasting, basting with the glaze every 10 minutes, until an instant-read thermometer inserted into the thigh registers 165 degrees, about 20 more minutes.

Remove the turkey from the oven and transfer it to a large cutting board. Tent the turkey loosely with foil and let it rest at least 45 minutes before slicing. Strain the drippings into a bowl and discard the solids. Add enough of the remaining chicken stock to make 6 cups of liquid.

To make the gravy: Melt the butter in a medium saucepan over medium heat. Whisk in the flour and cook until the flour is light golden brown, about 8 minutes. Slowly whisk in the stock-drippings mixture, then bring the mixture to a boil and whisk until the gravy begins thickening and the flour taste has been cooked out, about 10 minutes. Add more stock until you reach the desired consistency. If desired, add a splash of white wine and cook 2 more minutes. Stir in the herbs and season with salt and pepper to taste.

To serve, reheat the remaining stock in a saucepan over low heat. Remove the legs and wings, then remove the dark meat and shred. Remove the breasts and cut crosswise into 1-inch-thick slices. Place the meat on a platter and ladle some of the warm stock on top.

I think this recipe was fantastic. The glaze that was on the turkey made the skin perfectly brown and gave it a nice taste. The combination of the mustard and the maple syrup along with the horseradish, really did it for me. The original recipe uses 17 pound turkey so quantities are quite high. The turkey I bought was only 11 pounds so I cut the recipe by about one-third when I was making it. I think if you have a large bird, even bigger than 17 pounds, this recipe would work out pretty well. The meat was perfectly cooked and everything came out nice and juicy. Everyone seemed to really like the gravy as well. This is definitely a recipe that I will use again.


That’s all I have for today. Check back next time for another recipe. Until then, enjoy the rest of your day and enjoy your meal!


mapleturkey

 
Leave a comment

Posted by on December 8, 2014 in Cooking, Dinner, Gravy, Holidays, Poultry, Sauce, Turkey


Tags: , , , , , ,

Back Home for Pan-Roasted Chicken with Vegetables and Dijon Jus

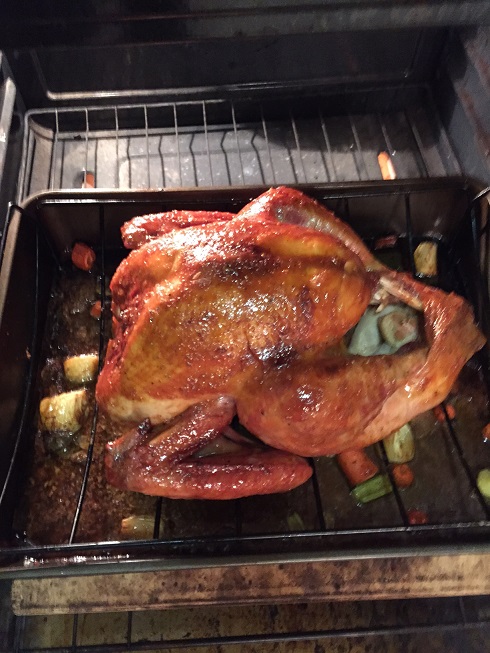
After spending last week visiting my family in North Carolina it’s back to the real world of work, school and cooking here in New York. We had a great visit with everyone and had a fun time over the Thanksgiving holiday, enjoying a great meal and good times with the family. It was good to get home after a long drive back so we took it easy Saturday and had a nice one dish meal on Sunday, making use of a whole chicken, some fresh veggies and this recipe from Serious Eats for a pan-roasted chicken with vegetables in a Dijon jus for some added zest and flavor. it’s another great one dish meal that you can put together pretty easily and is packed with great flavors.

Pan-Roasted Chicken with Vegetables and Dijon Jus

16 fingerling or yellow new potatoes, scrubbed

3 carrots, 2 peeled and cut into 1-inch chunks, 1 roughly chopped

Kosher salt

16 Brussels sprouts, halved

Freshly ground black pepper

4 tablespoons extra-virgin olive oil, divided

1 whole chicken (about 4 pounds), cut into 8 serving pieces, backbone reserved

1 cup dry white wine

1 onion, split in half

1 celery stalk, roughly chopped

3 to 4 sprigs fresh sage

2 bay leaves

2 cups chicken stock

1 shallot, thinly sliced

2 tablespoons minced fresh parsley leaves

2 tablespoons butter

1 tablespoon Dijon mustard

1 tablespoon juice from 1 lemon

2 teaspoons fish sauce

Adjust an oven rack to the center position and preheat the oven to 450 degrees. Place the potatoes and the carrots cut into 1-inch chunks in a medium saucepan, cover the vegetables with cold salted water and bring them to a boil, then simmer the vegetables until they are just tender, about 10 minutes. Drain the vegetables and transfer them to a large bowl. Add the Brussels sprouts, season the vegetables with salt and pepper, toss with 2 tablespoons of the olive oil and set the vegetables aside.

Transfer the chicken backbone to the now-empty saucepan. Add the roughly chopped carrot, onion,celery, sage, and bay leaves. Set the saucepan aside. Season the chicken pieces thoroughly with salt and pepper.

Heat 1 tablespoon of the olive oil in a large cast iron skillet set over high heat until the oil is lightly smoking. Add the chicken pieces skin side down and cook, moving the chicken pieces as little as possible, until the chicken skin is rendered and a deep golden brown, about 10 to 14 minutes. Flip the pieces as they finish and lightly brown the second side, about 3 minutes longer. Transfer the browned chicken pieces to a plate and set them aside.

When all the chicken is browned, add the white wine to the skillet and scrape up any browned bits with a wooden spoon. Transfer the white wine to a medium saucepan and put in the reserved chicken backbone. Pour in any juices that have accumulated on the chicken resting plate and wipe out the skillet with a paper towel.

Add the chicken stock to the saucepan with the chicken backbone. Bring the stock to a simmer over high heat, reduce the heat to the lowest setting, cover and let the stock gently bubble while the chicken roasts. Add the remaining tablespoon of olive oil to the skillet and heat the skillet over high heat until the oil is lightly smoking. Add the vegetable mixture and top the vegetables with the chicken pieces, skin side up. Transfer the skillet to the oven and roast until the chicken breasts register 150 degrees and the chicken legs register at least 165 degrees on an instant read thermometer, removing the chicken pieces and transferring them to a clean plate as they finish roasting, about 45 minutes total.

When all of the chicken pieces have finished roasting, add the shallots to the skillet with the vegetables and toss them to combine. Return the skillet to the oven and continue roasting, flipping the vegetables occasionally, until the vegetables and shallots are browned all over, about 10 minutes. Remove the skillet from the oven, add the parsley, toss to coat and then place the chicken pieces directly on top of the vegetables.

Strain the simmering chicken broth mixture into a small saucepan or bowl. Whisk in the butter, Dijon mustard, lemon juice and fish sauce. Season the jus to taste with salt and pepper. Serve the chicken and vegetables, serving the jus at the table.

This meal is packed with ingredients and lots of great flavor. You get a really nice browning on the chicken pieces and I liked everything set over the vegetables to get even more flavor onto the veggies. I actually added the shallot in from the start and roasted the vegetables just with the chicken, tossing them lightly when I took the chicken out and then put the chicken right back in the skillet. The Dijon jus was a nice touch with the chicken and vegetables, with a good mix of the mustard, lemon juice and fish sauce. It all came together very nicely and mostly in one dish (outside of the prep work) so it was easy clean-up as well.

That’s all I have for today. Check back next time for another recipe. Until then, enjoy the rest of your day and enjoy your meal!

01eacd1ae1581331905b0d8e5785805eb4696d4258


Tags: , , , , ,

Stir it Up With a Crispy Garlic Chicken Stir Fry

When life gets hectic around the homestead I usually turn to making a stir fry for dinner. it is often the easiest thing to putt together in a short amount of time, doesn’t typically use a lot of ingredients and can be made basically with whatever you happen to have on hand, including any leftovers you want to try to use. Such was the case yesterday and when I had lot going on all day, Michelle was working late and I just needed something easy that I could put on the table fast. I decided to make use of this recipe that I had seen at Savory Nothings for a crispy garlic chicken that I decided to turn into a very easy stir fry when I included some leftover green beans, a couple of sliced peppers and some shallot.

Crispy Garlic Chicken Stir Fry

For the Sauce:

3 cloves garlic, minced

6 tablespoons honey

2 tablespoons soy sauce

2 tablespoons barbecue sauce

1 teaspoon fish sauce

1 teaspoon white wine vinegar

1/2 cup water

For the Chicken and Vegetables:

1 pound boneless, skinless chicken breasts, cut into chunks

1/2 cup flour

3 eggs

1/2 cup breadcrumbs

Vegetable oil, for frying

1 cup green beans, fresh or frozen (trimmed if fresh)

1-2 small bell peppers, any color, seeded and sliced into rounds

1 shallot, diced

To make the sauce, add the minced garlic, honey, soy sauce, barbecue sauce, fish sauce, white wine vinegar and the water together in a small saucepan set over medium-high heat. Bring the mixture to a boil then reduce the heat to medium-low and simmer the sauce until it begins to thicken, about 4 to 5 minutes. Set the sauce aside until the chicken is ready.

To make the chicken, pat the chicken dry with paper towels. In a shallow dish, add the flour. Whisk the eggs together in a second dish and place the breadcrumbs in a third shallow dish. To bread the chicken, first coat the chicken pieces in the flour, then dip the chicken pieces in the egg, shaking off any excess, and then dip the chicken in the breadcrumbs to coat them. Set the chicken pieces aside on a platter until all of the chicken is coated.

Heat a large nonstick skillet over medium-high heat. Add two tablespoons of the vegetable oil and heat the oil until it is shimmering. Add the chicken, cooking in batches so you do not overcrowd the pan, and cook the chicken for 6 to 8 minutes, until it is cooked through on the inside and golden and crispy on the outside.

Once all the chicken has been cooked, add the green beans, peppers and shallot to the skillet and saute the vegetables until they are heated through, about 2 to 3 minutes. Add the chicken back to the skillet with the vegetables and then coat the contents of the skillet with the garlic sauce. Toss all the ingredients with the sauce until everything is well coated and cook until the sauce has thickened to a syrupy consistency, about 2 minutes. Pour the contents of the skillet into a bowl or on a serving platter and serve.

Quick, simple and it all comes together in under 25 minutes. The sauce was perfect, just like your favorite sauce from your local Chinese restaurant, nice and thick and full of garlic and sweetness. You could really add any vegetables you like to this right at the end; I just happen to have green beans and peppers on hand but I think broccoli and baby corn would go really well with this as well. I served it simply with some white rice and we had a very easy meal to enjoy after a busy day.

That’s all I have for today. Check back next time for another recipe. Until then, enjoy the rest of your day and enjoy your meal!

01541505ba3af7aa6f10a92e9a18a63fec1c5a78ce


Leave a comment

Posted by on November 13, 2014 in Cooking, Dinner, Leftovers, Poultry, Sauce, Stir Fry


Tags: , , , , , ,

Kid Friendly and a Healthier Option – Oven Fried Shrimp

Any time that  I get some shrimp Sean is always asking me to make fried shrimp. Not that I don’t like fried shrimp, I love it myself; the problem is that I hate cooking with all of that oil from a health standpoint and clean up standpoint and there are other ways to cook shrimp that I love as well. He however, has a hang up on fried shrimp so when Michelle is traveling, I very often will get some shrimp and make something for dinner (Michelle likes shrimp, but they are not a favorite of hers, so she would just as soon not have them anyway). I had seen some recipes for oven fried shrimp before but none of them ever really looked like the breading or coating held up that well or cooked well so you got a good coating on them until I saw this recipe from Williams-Sonoma for oven fried shrimp. The picture looked pretty good and the recipe seemed simple enough, so I thought I would give it a try.

Oven Fried Shrimp

1 cup ketchup-style chili sauce or ketchup

2 tablespoons drained prepared horseradish

Finely grated zest of 1 lemon

1 tablespoons fresh lemon juice

Hot pepper sauce

1 1/4 cups panko or other dried breadcrumbs

1 teaspoon sweet paprika

1/2 teaspoon dried oregano

1/2 teaspoon dried basil

1/2 teaspoon dried thyme

1/2 teaspoon granulated garlic

1/2 teaspoon kosher salt

1/8 teaspoon cayenne pepper

4 tablespoons butter, melted

2 tablespoons olive oil

2 pounds large shrimp, peeled and deveined

To make the cocktail sauce, stir together the chili sauce or ketchup, the horseradish and the melon zest and lemon juice in a small bowl. Season the sauce with hot pepper sauce to taste. Set the cocktail sauce aside.

Preheat the oven to 400 degrees. Lightly oil a large rimmed baking sheet. In a medium bowl, stir together the bread crumbs, paprika, oregano, basil, thyme, garlic, salt and cayenne pepper. In another bowl, mix together the melted butter and the olive oil. Working in batches, toss the shrimp in the butter mixture to coat it well and then coat the shrimp with the bread crumb mixture, shaking off any excess. Spread the shrimp in a single layer on the prepared baking sheet.

Bake the shrimp until the coating is golden brown and the shrimp are opaque throughout when they are pierced with the tip of a knife, about 10 minutes.

Transfer the cocktail sauce to individual small bowls for dipping. Serve the shrimp with the sauce on the side.

This is very simple and turns out a pretty good coating for the shrimp. I used basic bread crumbs, but I think the coating would be even better with panko and will try it that way next time to see how it is. If you wanted to jazz things up a bit and make these coconut shrimp, you could try mixing in some shredded coconut with the breadcrumb mixture or even substituting it completely for the bread crumbs and following the recipe as indicated. Personally, I am not a fan of coconut myself, but a lot of people love the coconut shrimp. You can then make or buy your favorite sweet chili sauce for dipping instead of the cocktail sauce. I made this as our entrée for the meal and served it with some rice and vegetables, but it would be a great appetizer for any time. I liked the shrimp and the cocktail sauce in this one and Sean gobbled these up as well, so I think the recipe is a pretty good alternative to frying the shrimp and using all of that oil.

That’s all I have for today. Check back next time for another recipe. Until then enjoy the rest of your day and enjoy your meal!

01df51cbcced80f19903c1417f2508828d680ddb93


3 Comments

Posted by on November 5, 2014 in Appetizers, Cooking, Dinner, Sauce, Seafood


Tags: , , , , ,

Better Believe This Bourbon-Butter Steak Tips with Maple Mashed Sweet Potatoes is the Bomb!

Leave it took Cook’s Country Magazine to keep supplying me with easy to make, quick weeknight meals. Finding something that uses just a few ingredients but comes together really nicely to taste great and can all be done in less than 30 minutes is my idea of the perfect weeknight meal. We have been so busy around out house lately with work and all of the other family things going on and it is only going to get crazier as we get further into November and December with birthdays, holidays, parties, travel and more. This means finding fast and easy meals that we can do without a lot of effort. This one for bourbon butter steak tips with maple mashed sweet potatoes is great because you can get the sweet potatoes softened in the microwave, get your steak tips going and have everything ready in about 20 minutes. Add a green vegetable and you are good to go.

Bourbon-Butter Steak Tips with Maple Mashed Sweet Potatoes

2 pounds sweet potatoes, peeled and cut into 1/2-inch pieces

3 tablespoons vegetable oil

Salt and freshly ground black pepper

1/4 cup heavy cream

1/4 cup maple syrup

1 1/2 pounds sirloin steak tips, trimmed and cut into 2-inch chunks

1/2 cup bourbon

2 teaspoons apple cider vinegar

2 tablespoons butter

1 tablespoon chopped fresh chives

Combine the sweet potatoes, 2 tablespoons of the vegetable oil, 1 teaspoon of salt and 1/2 teaspoon of black pepper in a large bowl. Cover and microwave until the sweet potatoes are tender, about 10 minutes, stirring the potatoes halfway through the cooking process. Add the heavy cream and 3 tablespoons of the maple syrup and mash the potatoes until they are smooth; cover the potatoes and set them aside.

Meanwhile, pat the steak tips dry with paper towels and season the steak with salt and pepper. Heat the remaining 1 tablespoon of vegetable oil in a large skillet set over medium-high heat until the oil is just smoking. Add the steak tips and cook them until they are well browned all over and the meat registers 125 degrees (for medium-rare), about 6 to 8 minutes. Transfer the steak tips to a platter and tent them loosely with foil to keep them warm.

Off the heat, add the bourbon, apple cider vinegar and the remaining 1 tablespoon of maple syrup to the skillet. Return the skillet to medium-high heat and cook until the sauce is slightly thickened, about 3 minutes, scraping up any browned bits from the bottom of the skillet. Off the heat, whisk in the butter and season the sauce with salt and pepper to taste. Return the steak and any accumulated juices to the pan and toss the steak to coat it well with the sauce. Sprinkle the steak with chives and serve it with the mashed sweet potatoes.

This was a very delicious meal with a nice hint of the maple syrup permeating the potatoes and the steak. Throw in the taste that the bourbon adds to the sauce and it really makes the steak out of this world. I really think you could make this with any cut of beef if you did not have steak tips to use; you could use a London broil, sirloin or any other cut of beef that you really prefer or even use a whole steak like a rib eye or strip steak and it would be great. It’s so easy to make and you get wonderful layers of flavor.

That’s all I have for today. Check back next time for another recipe. Until then, enjoy the rest of your day and enjoy your meal!

IMG_0721


2 Comments

Posted by on November 3, 2014 in Beef, Cooking, Dinner, Potatoes, Sauce


Tags: , , , , , ,

Tasty, Tantalizing and Terrific – Homemade Tater Tots with Spicy Mayonnaise

Sean has been asking me for months now to try my hand at making some homemade tater tots. Tater tots are pretty much a religious experience around my home and Michelle and Sean absolutely love them. When we have burgers, it’s always with tater tots. I have looked at recipes for homemade tots before and they always seemed very involved and difficult and didn’t look like they would really turn out all that great so I stayed away from them. A few days ago I saw this recipe from Bon Appetit and read through it and could not believe how easy it would be, so I knew this was going to be the time I would try it out.

Homemade Tater Tots with Spicy Mayonnaise

For the Spicy Mayonnaise:

1 cup mayonnaise

1 teaspoon adobo sauce from canned chipotles in adobo

1 teaspoon hot pepper sauce

¼ teaspoon smoked Spanish paprika (optional)

Kosher salt and freshly ground black pepper

For the Tater Tots:

3 medium russet potatoes (about 2 pounds), scrubbed

2 scallions, chopped

½ cup seasoned Italian breadcrumbs

¼ cup heavy cream

1 tablespoon sour cream or plain yogurt

1 tablespoon butter, room temperature

½ teaspoon granulated garlic

¼ teaspoon freshly ground black pepper

2 teaspoons kosher salt, plus more

2 tablespoons grated Parmesan, plus more

2 large eggs, beaten to blend

Vegetable oil, for frying

For the spicy mayonnaise, combine the mayonnaise, adobo sauce, hot pepper sauce, and paprika, if using, in a small bowl; season the mayonnaise with salt and pepper to taste.


For the tater tots, preheat the oven to 400 degrees. Prick the potatoes all over with a fork and bake them directly on an oven rack until the potatoes are very soft when they are squeezed, about 60 to 75 minutes. Let the potatoes cool slightly so they are easy to handle.


Cut the potatoes in half and scoop the flesh into a medium bowl; discard the potato skins. Mash the potatoes, then mix in the scallions, breadcrumbs, cream, sour cream, butter, granulated garlic, pepper, 2 teaspoons of salt, and 2 tablespoons of Parmesan cheese. Mix in the eggs until they are just  combined. Roll 1-tablespoon portions of the potato mixture into balls.


Pour the vegetable oil into a medium skillet to a depth of ½-inch and heat the oil over medium heat until bubbles form immediately when a little potato mixture is added. Working in batches, fry the tater tots until they are a deep golden brown, about 3 minutes per side. Drain the tater tots on paper towels. Season the tater tots with salt to taste and serve them with the spicy mayonnaise.
I did do one thing that is not included in the recipe that does seem to make a difference, at least to me. After I rolled the tater tots (and I used a cookie scoop to roll them, the medium-sized one) I put them on a plate and put them in the refrigerator for 30 minutes. This seemed to firm the potatoes up nicely so they really held their shape well and went into the oil easily and did not fall apart along the way. I have to say while they are not exactly like the frozen tater tots you buy in the store, they are much creamier and have better texture. It kind of tastes like a deep-fried mashed potato, which for us was fantastic. They were really easy to make and came out perfectly for me and I think it made about 30 to 40 tater tots, which was plenty for us. It takes a little longer than opening up the bag out of the freezer but in my mind it is worth the effort to make them.
That’s all I have for today. Check back next time for another recipe. Until then, enjoy the rest of your day and enjoy your meal!
IMG_0738 IMG_0733
 
Leave a comment

Posted by on October 29, 2014 in Cooking, Potatoes, Sauce, Snacks, Uncategorized


Tags: , , , , , ,

Make a Mess of These Meatball Sliders

I am always on the lookout for different meatball recipes. It is just one of those meal items that I like to tinker with and I am looking to add new flavors to meatballs to jazz them up a little bit. Whether it is for a simple meal with spaghetti in tomato sauce, as an appetizer for a buffet or party, to have in gravy over rice or noodles or to make a nice sub or sandwich meatballs are one of those things that you can do a lot of things with and make them in wide variety of ways with many different ingredients. I came upon this recipe from Alton Brown for meatball sandwiches on Parmesan parsley biscuits and thought it sounded great, but to me they are perfect meatball sliders for an appetizer, party or dinner. it’s a very easy recipe that gives you some basic meatballs with great tasting biscuits and a nice spaghetti sauce to boot.

Alton Brown’s Meatball Sandwiches (Meatball Sliders)

For the Meatballs:

1 pound ground beef
1 pound ground pork
1 pound ground veal
1 egg
1/2 small onion, chopped
1 teaspoon dried parsley
1 teaspoon granulated garlic
1 teaspoon dried oregano
1 teaspoon salt
1/2 teaspoon freshly ground black pepper
Parmesan Parsley Biscuits, recipe follows
Spaghetti Sauce, recipe follows
Provolone cheese, thinly sliced

For the Parmesan Parsley Biscuits:
3 cups all-purpose flour
1 cup grated Parmesan
1/4 cup sugar
2 tablespoons baking powder
1/2 teaspoon salt
1/2 teaspoon freshly ground black pepper
1 stick chilled unsalted butter, cut into cubes
1/4 cup chopped fresh parsley or chives
1 cup whole milk, chilled

For the Spaghetti Sauce:
1 medium onion, chopped
2 cloves garlic, minced
2 tablespoons olive oil
2 (14-ounce) cans diced tomatoes
20 fresh basil leaves, chopped

Preheat the oven to 375 degrees.

For the meatballs,in a large bowl, combine the beef, pork, veal, egg, onion, parsley, garlic, oregano, salt, and pepper and mix all of the ingredients until they are well combined. Scoop the mixture into mini muffin tins or onto a wire rack set over a rimmed baking sheet. Bake the meatballs until they are browned and cooked through, about 15 to 20 minutes.

For the Parmesan parsley biscuits:
Preheat the oven to 400 degrees.

In a large bowl, combine the flour, 1/2 cup of the Parmesan, sugar, baking powder, salt, and pepper. Whisk until everything is well blended. Add the butter and combine the mixture with your fingertips until a coarse meal forms. Mix in the parsley. Gradually add the milk, tossing the mixture with a fork until moist clumps form. Add extra milk if the mixture is too dry. Put the dough on a floured work surface, folding 8 to 10 times until it becomes firm. Let the dough rest for 10 minutes under a damp towel. Roll out the dough on a lightly floured work surface. Using a 2-inch-diameter biscuit ring, cut out the biscuits and put them on a parchment paper-lined baking sheet. Sprinkle the tops of the biscuits with the remaining 1/2 cup of Parmesan cheese and bake until the biscuits are puffed and golden, about 15 minutes.

For the spaghetti sauce, in a medium pan set over high heat, saute the onion and the garlic in olive oil until both are softened, about 3 minutes. Add the tomatoes and allow the mixture to simmer until it is slightly reduced and thickened, about 25 minutes. Stir in the fresh basil just before serving.

To build the sliders, slice a biscuit in half and place a meatball on the bottom half of the biscuit. Cover the meatball with as much spaghetti sauce as you like and top each meatball with a slice a provolone cheese. Place the biscuit top on top of the meatball and continue until all of the biscuits are filled.

I have to say I really liked these. While the meatball recipe is very basic, it does taste good and produces a moist meatball that goes well with the sauce. The real star of this one I think is the Parmesan biscuit, which comes out perfectly and goes really nicely with the meatballs as a slider. The biscuit has great flavor and is really easy to make so you can make this to go with other meals besides this one. we even used some to make breakfast sandwiches with some bacon or sausage and egg. Of course the meatballs and sauce can be for anything that you would use meatballs for as well besides just sliders if you want a nice, basic and easy meatball recipe.

That’s all I have for today. Check back next time for another recipe. Until then, enjoy the rest of your day and enjoy your meal!

IMG_0730


Tags: , , , , , , ,

 
National Day Calendar

Fun, unusual and forgotten designations on our calendar.

Jennifer Probst

a little bit naughty a little bit nice

Laissez Faire

Letting Life Lead

What To Have For Dinner Tonight

Simple and delicious dinner inspiration